<?xml version="1.0" encoding="UTF-8"?>
<!--
        Licensed to the Apache Software Foundation (ASF) under one
        or more contributor license agreements. See the NOTICE file
        distributed with this work for additional information
        regarding copyright ownership. The ASF licenses this file
        to you under the Apache License, Version 2.0 (the
        "License"); you may not use this file except in compliance
        with the License. You may obtain a copy of the License at

        http://www.apache.org/licenses/LICENSE-2.0

        Unless required by applicable law or agreed to in writing,
        software distributed under the License is distributed on an
        "AS IS" BASIS, WITHOUT WARRANTIES OR CONDITIONS OF ANY
        KIND, either express or implied. See the License for the
        specific language governing permissions and limitations
        under the License.
-->
<!-- START SNIPPET: beans -->
<beans xmlns="http://www.springframework.org/schema/beans"
    xmlns:xsi="http://www.w3.org/2001/XMLSchema-instance"
    xmlns:jaxws="http://cxf.apache.org/jaxws"
    xsi:schemaLocation=" http://www.springframework.org/schema/beans
    http://www.springframework.org/schema/beans/spring-beans.xsd
    http://cxf.apache.org/jaxws http://cxf.apache.org/schemas/jaxws.xsd">
    <import resource="classpath:META-INF/cxf/cxf.xml"/>
    <import resource="classpath:META-INF/cxf/cxf-servlet.xml"/>
    <jaxws:endpoint id="helloWorld" implementor="com.locqi.test.impl.HelloWorldImpl" address="/HelloWorld"/>
</beans>
<!-- END SNIPPET: beans -->
<?xml version="1.0" encoding="UTF-8"?>
<!--
  Licensed to the Apache Software Foundation (ASF) under one
  or more contributor license agreements. See the NOTICE file
  distributed with this work for additional information
  regarding copyright ownership. The ASF licenses this file
  to you under the Apache License, Version 2.0 (the
  "License"); you may not use this file except in compliance
  with the License. You may obtain a copy of the License at

  http://www.apache.org/licenses/LICENSE-2.0

  Unless required by applicable law or agreed to in writing,
  software distributed under the License is distributed on an
  "AS IS" BASIS, WITHOUT WARRANTIES OR CONDITIONS OF ANY
  KIND, either express or implied. See the License for the
  specific language governing permissions and limitations
  under the License.
-->
<web-app xmlns="http://java.sun.com/xml/ns/javaee" xmlns:xsi="http://www.w3.org/2001/XMLSchema-instance" version="2.5" xsi:schemaLocation="http://java.sun.com/xml/ns/javaee           http://java.sun.com/xml/ns/javaee/web-app_2_5.xsd">
    <display-name>cxf</display-name>
    <servlet>
        <description>Apache CXF Endpoint</description>
        <display-name>cxf</display-name>
        <servlet-name>cxf</servlet-name>
        <servlet-class>org.apache.cxf.transport.servlet.CXFServlet</servlet-class>
        <load-on-startup>1</load-on-startup>
    </servlet>
    <servlet-mapping>
        <servlet-name>cxf</servlet-name>
        <url-pattern>/*</url-pattern>
    </servlet-mapping>
    <session-config>
        <session-timeout>60</session-timeout>
    </session-config>
</web-app>
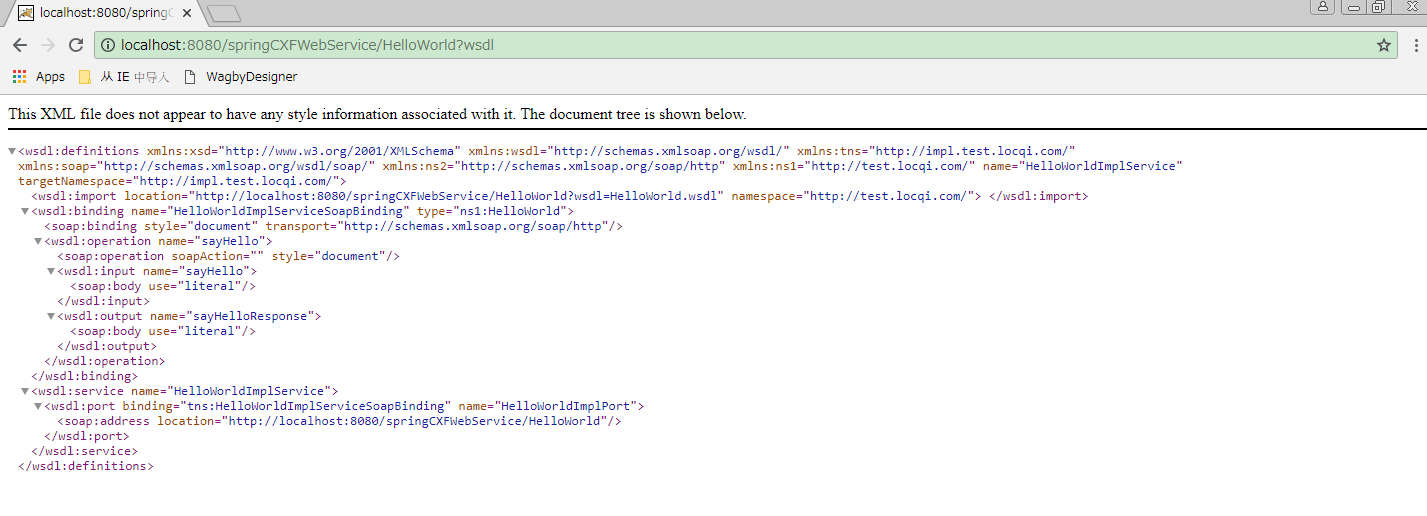
该文件实际上是定义了处理WebService的CXF Servlet的映射关系。
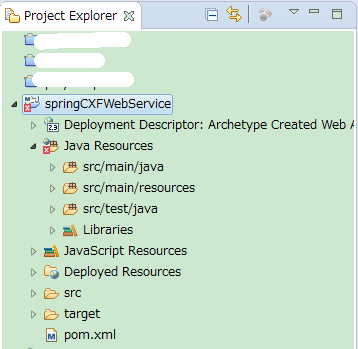
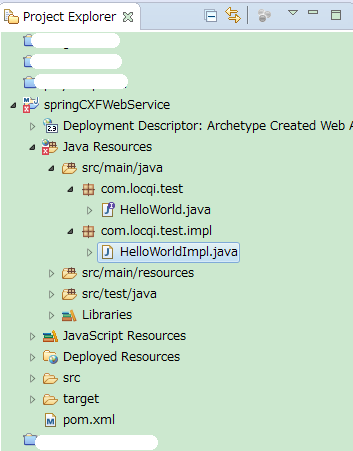
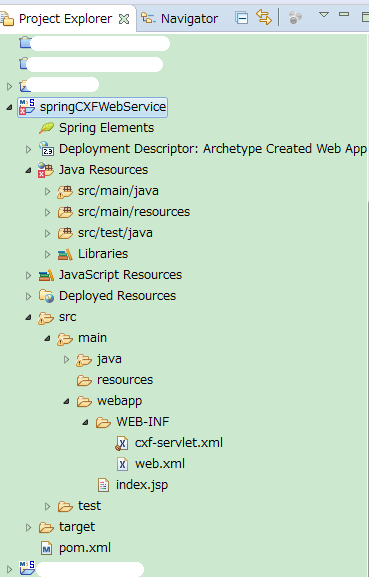
完成步骤3和4以后的工程目录如下:
5. 编译打包
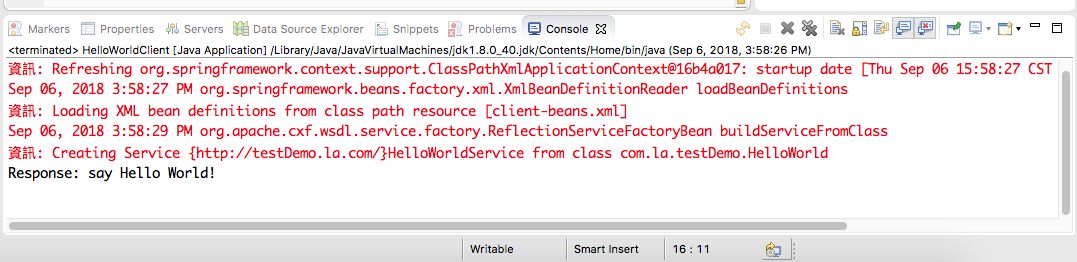
利用maven(package -X)编译打包成springCXFWebService.war (在Eclipse上右击工程名 Run as -> Maven build)
<?xml version="1.0" encoding="UTF-8"?>
<!--
        Licensed to the Apache Software Foundation (ASF) under one
        or more contributor license agreements. See the NOTICE file
        distributed with this work for additional information
        regarding copyright ownership. The ASF licenses this file
        to you under the Apache License, Version 2.0 (the
        "License"); you may not use this file except in compliance
        with the License. You may obtain a copy of the License at

        http://www.apache.org/licenses/LICENSE-2.0

        Unless required by applicable law or agreed to in writing,
        software distributed under the License is distributed on an
        "AS IS" BASIS, WITHOUT WARRANTIES OR CONDITIONS OF ANY
        KIND, either express or implied. See the License for the
        specific language governing permissions and limitations
        under the License.
-->
<!-- START SNIPPET: beans -->
<beans xmlns="http://www.springframework.org/schema/beans"
    xmlns:xsi="http://www.w3.org/2001/XMLSchema-instance"
    xmlns:jaxws="http://cxf.apache.org/jaxws"
    xsi:schemaLocation="
    http://www.springframework.org/schema/beans
    http://www.springframework.org/schema/beans/spring-beans.xsd
    http://cxf.apache.org/jaxws
     http://cxf.apache.org/schema/jaxws.xsd">
    <bean id="client" class="com.locqi.testClient.HelloWorldClient"
        factory-bean="clientFactory" factory-method="create"/>
    <bean id="clientFactory" class="org.apache.cxf.jaxws.JaxWsProxyFactoryBean">
        <property name="serviceClass" value="com.locqi.test.HelloWorld"/>
        <property name="address" value="http://localhost:8080/springCXFWebService/HelloWorld"/>
    </bean>
</beans>
<!-- END SNIPPET: beans -->